On Saturday night, once a month, I go to a Stamp Club that I really love. Last month, Sandy asked me to show the ladies how I use Copics. So last night I took my copics to class and showed them the Sketchers that I use quite frequently. I knew that I had to explain what various reviews said about paper and ink. They asked what I used and I explained that Mementos were my only choice of ink and that I use Neenah Classic Crest 110# but I would get 80# next time I ordered a ream. I showed them what the marker looked like and in addition to the little pictures, the grey line around the marker was a sure way of telling the brush end which I prefer.
Then I explained that as far as I was concerned if you don't use the blending or feathering technique, don't go to the expense of buying them.
They were warned against buying the sets of Copics that Copic puts out because unless you have all the markers from them, you will not be able to blend as easily.
I don't know of any other company that puts out sets of Copics as they should be. TAC has just come out with their Caboodle sets and they are set up so that the individual colors are together as they should be.
For those of you who do not know, Copics are marked with an abbreviation of the color first, next comes how true the color is 0 being the strongest and 9 being the least as it has more grey to it. This is true as you go up the numbering. This does not mean the brightest color. The next number represents the lightest of that color group to the darkest. This again goes from 0-9.
For blending purposes, the norm is to chose the first two as the family and the lightest to the darkest. So for blue denim, I prefer B (for blue) 9 for the least strong pure color, then I chose 3, 5 and 7. So my markers would be B93, B95, and B97. The truth is for the third number I could use any number as long as the first two numbers remain the same.
I really don't want to get into blending here, but an intoduction would be to lay down your lowest number first, using tiny circles to apply. Then check the back of the paper to be sure it is showing through. You apply that color all over the item. Now, without getting into the direction of light, etc, the easiest way is to outline the outer edge of that part of the image with the next marker. Take your lightest marker again and blend them together. I actually like the feathering technique, I flick the light color over the dark until you no longer see where one begins and the other ends. The next step would be to apply the third color where you want your deepest shadows and the take the lightest marker again and flick it over all of the colors so there is no line. It should look like the color just gets darker. You can use mixed media with this BUT the Copics have to be DRY!
I used a white prismacolor pencil to place highlight where I wanted them. Then on my card, I used chalks and a torn piece of paper to make clouds for the background. This poor little girl had her string on her balloon break and she went sailing up into the sky. I sure hope she landed somewhere safe!!
Do you think they may have gotten a little confused? Well then I passed out 3 markers to each of the 8 ladies and a 2 x 5 strip of Neenah and had them do it. Eventually each one of them was blending beautifully. They then all wanted them so it went downhill from there - LOL. One of the ladies is determined to get them so she is booking a party from me to get the Copic set for 1/2 price by having sales of over $100. Then for every booking she gets, when the other person has her party, then she will be entitled to get another 1/2 priced set. She is usually timid but she is more determined then timid and she realizes that she is doing her friends and their friends a favor in these economic times. Our wonderful Company, The Angel Company reduced their prices where all other companies increased their prices. What a Company!!!!!
So that is my saga from last night. Oh one more thing, I used the card in the last post to demonstrate how to do the blending. Go look at it and click on it twice to enlarge it.
Have a great day!
Sunday, August 8, 2010
Saturday, August 7, 2010
My TAC girl
Well, I have been gone quite awhile, but now I'm back!
I have a Copic class to give Saturday which might be today so I thought I would show you my copic girl. The stamp comes from The Serendipity magalogue which came out this winter. The stamp set number is T-3254 and is called Wonder and Joy. What a great set! There isn't one stamp that I don't adore!
The paper is from V-700 Rockin Roxie Matchbook kit. I layered a light pink behind the girl and placed the thing on white card stock.
I used quite a number of copics, So let me list them for each section of the card. First let me tell you that I used Neenah Crest for the Copics along with Tuxedo Black Memento ink.
The Balloon, I used: Y11,13,17 then I used a white colored pencil on the highlight AFTER the copics were dry. The string was done with Y17 and the colored blender to soften the brightness.
The Hair, I used: E 33, 37 ,44
The skin, I used: E 0000, 00 and R08. I love her cheeks.
The top, I used R81, 85.
The pants, I used R 91, 93 and 95. I used the white colored pencil in the middle of each leg. I used it mostly on her knees.
Well, I sure hope this means my muse is back!!! Hope to see you soon!!!
Wednesday, April 21, 2010
Poignant Thoughts
This is an email I received from Sherrill Graff today and it is so true. It is why I share TAC with anyone I can find:
"started to think about what a friend said to me yesterday as I was bringing her home from the doctors. She had just had the news that she needed to go into the hospital to have more tests run. Uncertainty has set in, and worry too... What she said to me had a great impact. She said stamping over the last few months has brought her out of her shell and has brought sunshine in her life! Stamping has given her a reason to hang out with friends and to spend hours creating beautiful cards to share with friends. Stamping has brought more joy and keeps her out of pain. This is WHY we do what we do! This is why we serve and why we share what we love. We share and serve to lift help and inspire others. We don't just sell stamps we support friends in their times of need. May God bless this friend and may he bless each of us so we can do what he would do if he were standing here with us today.
I believe the light of Christ is in our hearts, lets find something to do to day to serve others.
love you, Sherrill"
Saturday, February 20, 2010
Projects - Fun was had by all!
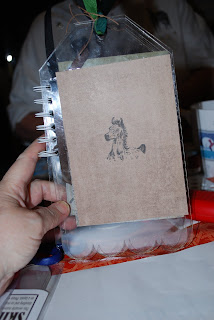
I'll start with Claudia's acrylic album. She did this so fast! I decided to take mine home and do it so I didn't look like a dud next to her!
As you can see, I took the pics before Claudia was done.
Now, we give you the man's version of the acrylic album - TA DA
Not so shabby for a guy, huh?
Actually, he did a beautiful (um) handsome job of it!!
Well, I've put enough on this posting so I will start another one. See you soon!
Angels busy doing what they are best at
Here's pictures of the people who did not duck out of the way of the camera - LOL!
I did mean stamping but they are really good at laughing and having a GREAT time!!!!
The Angel Company "Escape Out of the Box 2010"
Claudia Gates held the Escape Out of the Box at her home and very graciously invited me to stay the weekend. She is such a loving, warm and classy lady.
The Escape began on Saturday but I went on Friday to prepare for the event. I had a lot of cutting and scoring to do!
First, I would like to show you a group picture. Since I was taking the picture, I'm not in it, but you all know what I look like, anyway.
Here's the group picture taken outside the house.
Tuesday, January 19, 2010
Bon Appetite !
My BFF is visiting from Colorado for a week! I am so excited to see her. We only see each other probably twice a year. Did you ever meet someone and you knew she was going to be the best friend you have been looking for forever? Well that is Rita.
Yesterday she came over and I was in my studio finishing up some books I was making. I asked her if she wanted to see something done and she said she would love to.
I decided to make something for her. These are the colors of her kitchen and this little chef is on her wall paper. On her wall paper she also has black, teal and yellow.
First I took a piece of cardboard and used my Corner Chopper to round the corners. Of couse, had I been thinking, I should have glued the paper on and done them together. I then put that aside for later assembly.
Then I made the cover for the ruled note paper. I firmly believe that when you nake a note paper holder, you should cut the back of the note paper chip board into the shape of a T so that you can replace it when it is done. That means the cover is totally independent of the note paper. So you have to make a bar for the T to fit through and the make the cover.
I used another color that Rita has in her kitchen to cover up the top band of the note pad, taking into consideration that there is a tiny scored piece on top for the fold over. I stamped it with the stamp Bon Appetit which is all over her wallpaper.
I got down to business and made the front sheet that would cover the front of the notebook and look like it was made for it. Rita mentioned that teal and black played a big role in her wallpaper too. So I took a Koosh ball for each color and pounced Versacolor on the paper using both colors. That was the background paper for the layered Chef. I then used the wine bottle with cheese and grapes just like she has in her kitchen in Colorado.
I then took the large piece of covered chipboard and placed four really strong round magnets in each corner so she could mount them on the refridgerator. The last two things to do were to place the stamped yellow top cover on with Scor tape and attach the layered piece to the front of that. The last step was to slip the T shaped back of the note pad into the the card board strip I placed underneath. I used Scor tape for that too. I really believe that is the stronest tape for the job!
I hope you have enjoyed this little tutorial and will try it on your own.
Rita has a sister that she thinks will be very jealous because they both have the same wall paper and all the same items in them.
Don't forget, to see it larger, please quick twice. It was very nice to get to show you something besides christmas cards! Please post your comments. I would love to read them.
Subscribe to:
Posts (Atom)